Stable Position
It may be stating the obvious, but it really is vital that this exercise is undertaken shooting from an ultra stable position, so that we effectively eliminate human error as much as possible. We need to be comfortable, but the key aim is to get the gun steady.
If shooting from a bench setup at a range, then you may well have the luxury of a seated position, and a beanbag or range bag, and this can allow the gun to bed in. A PCP is more forgiving for any supported hold, but if shooting a springer, just make sure it is cradled and supported without contacting any hard object or part of the rest. In turn, make it a consistent hold or support throughout the exercise.
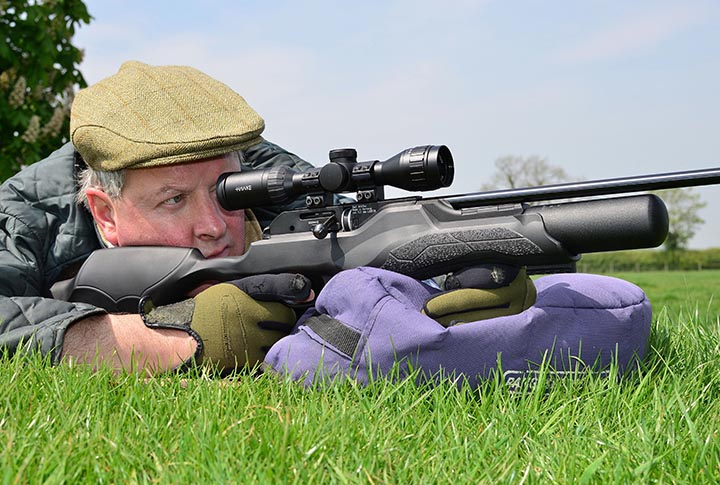
If shooting prone, lying in a field, then keep the shooting position as low as possible, again so our body and the gun can be supported to the maximum. Even elevated arms in the proper prone position, can still introduce excess movement and wobble, so ideally, have the gun lying directly off a beanbag, range bags, or some sort of padded support, for maximum stability.
Aim Bang On
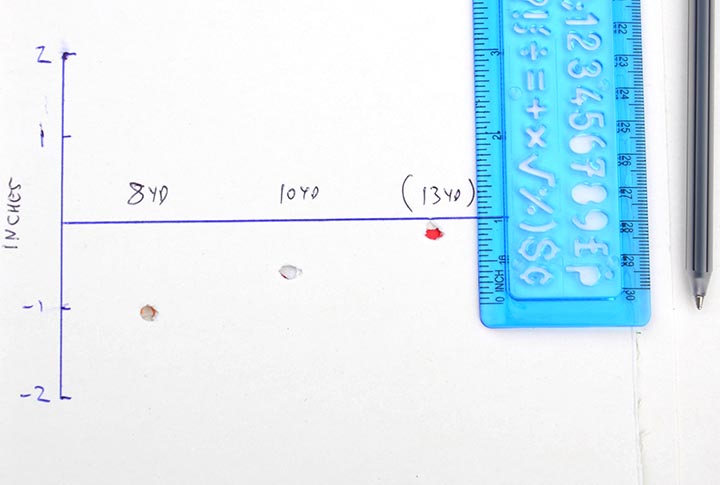
Now we are ready, take a few carefully aimed shots at each target distance, aiming bang on all the time. This trajectory check is easier to carry out if you’re on your own, so you can just settle down and relax. And in this scenario, place target boards at each distance as previously specified, but if you’re lucky enough to be on private land, you could have just one large target board with a straight line drawn, with a side scale marked in inches.
Keep moving back in five yard intervals, firing a few shots at each marked distance until all distances have been checked. Don’t worry if results aren’t too clear from down range, as all the results need to be carefully measured and logged at the end of the session.
The whole process requires concentration and precision, and it can be quite demanding – tired eyes viewing a tiny bullseye, as we attempt to place pellet on pellet. So a good rule of thumb, after an extended period, stop shooting if tired, and possibly pack up to continue another day. This ensures results are accurate and meaningful.
Collating the Data
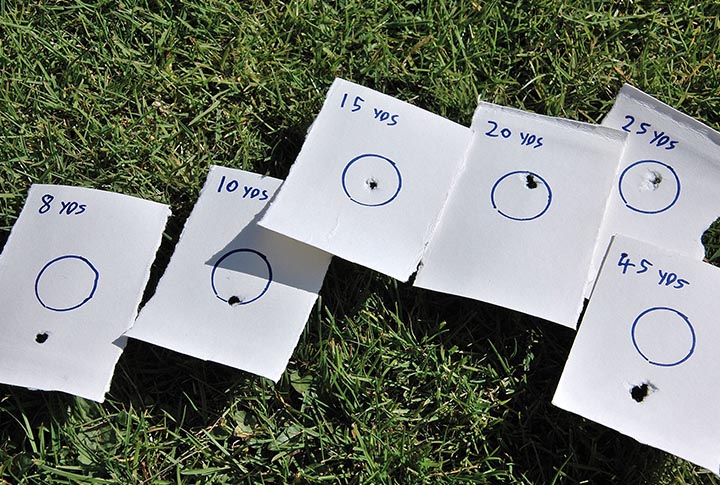
When the shooting is complete, we should now have plenty of target cards with all that valuable information. Either one large target with the continuous line, with our shots deviating along it at each marked distance, or a collection of individual targets from each distance.
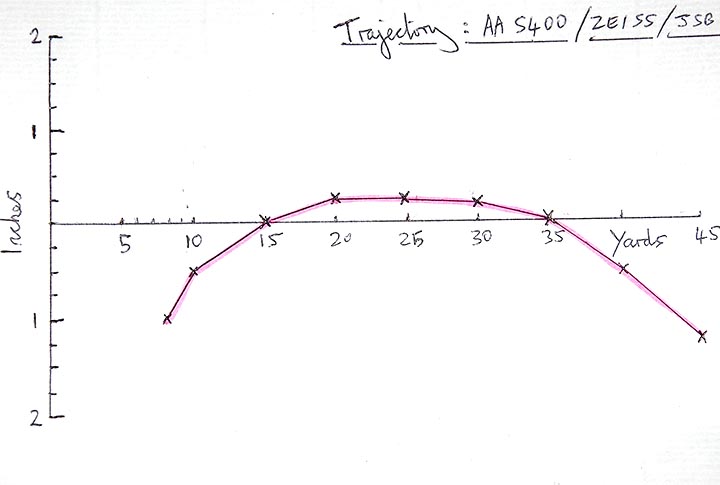
Select the mid shot from each group on each target and carefully measure the exact drop from the aim point/ centre of the target. Make a note of the figure, and repeat this for each target from each distance. Now we can plot a graph using that data, which will instil in our mind the exact path of the pellet through the distances.
With the graph shown, the vertical axis on the left shows the point of impact, either plus or minus – in other words the pellet falling above or below the rifle’s zero point. The horizontal axis can be marked in yards to show target distances and the impact points.
In the example shown, our full power .177 rifle has a main zero at 35yds, along with a secondary zero of 15yds. The highest point along the shown trajectory is around 20yds which is typical with this setup, with the pellet rising between a quarter inch, and a third of an inch at this distance, dependant upon the pellet used. Take a look at the graph, and at the maximum HFT distance of 45yds, the pellet shown is dropping around 1.25inches; again fairly typical with a full power .177, and medium mounts, using for the record quality 8.44grain JSB/Air Arms Diabolo Field pellets.
Results will slightly vary gun to gun, and even with one batch of quality pellets against another – so it really does pay to do your homework!
Producing a Data Sheet/Prompter
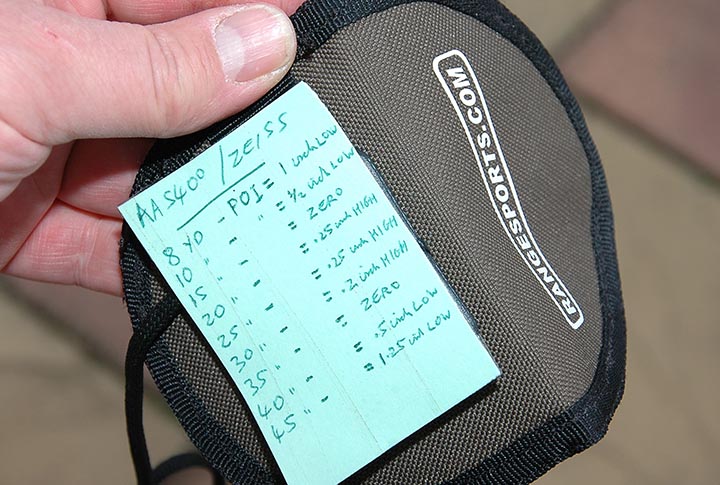
Finally, with all that information collected, it makes sense to create a small pocket sized prompt card, to carry around when shooting, just to reinforce our impact/aim points. Just mark out each target distance, and against each one, the impact point measurement. Alternatively use a small diagram of the scope’s reticle, with the aim points for each target distance marked against it.
Carry this around when you shoot, and you’ll soon learn every inch of the trajectory of your favourite rifle. It will be a huge confidence boost at the end of the day, and one of the keys to successful shooting.
Until next time, happy shooting
Range & Country